


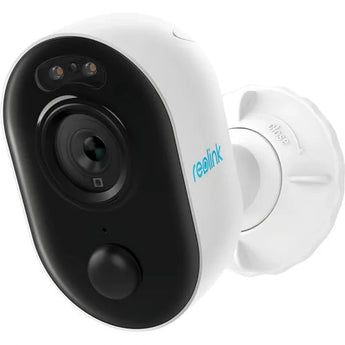


Reolink Lumus 4MP Dual-Band Wi-Fi Spotlight Camera
Pickup available at Elechid
Usually ready in 24 hours
Reolink Lumus 4MP Dual-Band Wi-Fi Spotlight Camera is designed for entrances and small outdoor areas with nearby power. This listing is for the upgraded 4MP model, with 2.4/5GHz dual-band Wi-Fi.
Key features
- 4MP Quad HD video with a fixed wide-angle view for entrances and small yards.
- Built-in spotlights for colour night vision, infrared night vision and a siren.
- Smart person, vehicle and animal detection, plus two-way audio.
- Local microSD recording with cards up to 512GB, sold separately.
- IP65 weather-resistant housing. A continuous wired power supply is required; Wi-Fi carries data, not power.
Specifications
| Resolution | 4MP (upgraded version) |
|---|---|
| Connection | 2.4/5GHz dual-band Wi-Fi |
| Dealer model code | WCLMC1080P01 |
| Power arrangement | Wired power required |
| Local storage | microSD up to 512GB; card sold separately |
| Weather resistance | IP65 |
Package and requirements
One Reolink Lumus 4MP camera. A recording card and recorder are separate purchases. Confirm the supplied regional power lead and mounting fittings before installation.
Check Wi-Fi reception at the final mounting position. Internet access is needed for remote viewing and notifications. This is the upgraded 4MP Lumus; older 1080p Lumus specifications and compatibility must not be applied to this model.
Compare and plan your system
Browse our security cameras and recorders and CCTV accessories. If mains power is unavailable, consider the Reolink Argus 4 Pro battery camera, subject to its separate recording and charging requirements.
Source: Reolink Lumus official product information.
When it arrives: first setup and checks
- Power up in an accessible position, and check package contents. Use the exact model's manufacturer instructions and app prompts to add it. Do not substitute another version's pairing or reset procedure.
- Use this model's supported Wi-Fi band, Ethernet or base-station connection. Pair near the router where appropriate, then check signal at the intended position before fixing it in place.
- Configure account/device security and viewing permissions using this model’s supported settings. Check date, time, notifications and framing.
- Enable a supported card, NVR/hub or cloud recording method. Test recording, playback and storage location before permanent mounting. Live view does not mean recording is active.
Setup reference: Reolink manufacturer setup and support Choose the matching model and hardware version. This self-setup checklist does not include on-site or done-for-you setup services.


